A blog about all things crafty with a focus on yarn crafts and a side of everything from wood carving to origami to baking and gardening to name just a few
Well, I did it. I bought a weaving loom. It's all over now. Not only am I hooked, but my daughter is too.:)
We bought a 10" Cricket loom. If you've never woven before, like me, there is a lot of new terminology to get used to. The booklet that comes with the loom has a glossary that is helpful.
I think the hardest part is warping the loom. Once you figure that out, weaving is a breeze.
Here is the loom warped and ready to weave.
Here is my finished scarf (I have not washed or blocked it yet. I am so happy with it. I secured the edges with hemstitch. You can find a great tutorial here
Have you ever wondered what to do with all those plastic bags that you seem to accumulate? Well, you can make "yarn" out of them and knit or crochet with it. It's called plarn; plastic "yarn".
1st, you need a plastic bag.
Lay it out flat and cut off the bottom
Sorry, picture is fuzzy. Now fold bag in half leaving about 1 inch between edges.
Now accordion fold bag as above, still leaving that 1 inch.
Cut off handles.
Now cut at one inch intervals across folded bag being careful not to cut the 1inch area on the seam of the bag.
Unfold bag. You can see that that 1inch space that was left uncut is now a 2 inch area that connects the strips.
Starting at one edge of the bag, cut one of the strips on a diagonal.
Your next cut is also on a diagonal and you will be cutting through the 2 inch area in order to create a continuous strip.
Here is one bag all cut.
Here is what you can do with it. Here I used two trash bags and two grocery bags to make what I call the Trashy Bag.
A few days into summer vacation and the kids say they are already bored.
"Mom! What are we going to do today?" (In a sing songy whiny kind of chorus)
Today, at least, I am ready. Time for tye dye 😀
If you've never tried it, tye dye is easy to do, and as you can see, there are endless variations.
Tye dye can be a bit messy (my hand is currently an awkward shade of blue/green) so make sure wear gloves and to cover your work surface, or better yet, go outside. You can get all the supplies from your local craft store.
Video Added 6/23 Lets rewind back to February. During one of several storms that blanketed us with snow and ice, several huge trees came down on our property. I thought that it was such a shame that all I knew how to do with all those trees was to chop them up into firewood.
Now fast forward to May. I went on a field trip with my daughter to The Churchville Nature Center to learn about the Lenape Indians and their way of life pre-contact. The kids learned how to make a fire and grow vegetables. Then we were taught how to make cordage. My mind was blown. It was so simple. I just couldn't believe that I had not learned this skill before. At the nature center, we used raffia to make our cordage. I thought that this could be a great use for my fallen trees.
My daughter and I headed straight int the woods after school that day. After a bit of looking, I found the tree I was searching for. It is the Tulip Tree. It has a unique bark that peels off into fibrous strips.
Here is a picture of both the outside of the bark and the inside.
The bark is very dry and needs to be soaked.
To make the cordage, you will need one length of bark. You then fold the bark in half. You will need somewhere to secure the end of your cordage. I use a garden spike to demonstrate. Think of the bark as one piece of yarn; I will call the pieces strands. Take one piece of the bark in each hand and then cross the strand from the right over the left. Now place that strand in your left hand and with the strand in your right hand, begin twisting the bark between your fingers clockwise. Now cross that strand from right to left over the other strand. Place the twisted strand in your left hand and begin twisting the other strand as indicated above.
Here is a short video. My 9 year old was behind the camera :)
Pretty soon, you will have cordage or rope that looks like this!
You can add pieces of bark to your cordage to make it any length.
So, what do you do with it? You can make an arbor with fallen wood and secure it with your handmade rope.
Or, you can use it in your garden, like this….
The possibilities are endless. This technique could also be used with yarn to make a custom piping/cordage for a crocheted or knitted piece. A wonderful feature of this rope is that it does not unravel or fray when cut.
There is something very satisfying about learning an ancient skill. It not only gives you some insight to the way our ancestors lived thousands of years ago, but shows you how those skills can still find a place in modern times. Give it a try!
It's strawberry time!!!! The season is a little late this year and its harder to pick in the heat, but here are yesterday's pickings .....
If you have never picked your own strawberries you should go do it right now!!!!! There is no comparison between grocery store strawberries and the locally grown berries. The local berries actually taste like strawberries and the ruby red color is just beautiful. So, what do you do with all those strawberries? You make jam, of course :)
If you've never tried it, making jam is really very simple. Click here for a wonderful site about canning with great pictures and recipes. This 1st batch was just Strawberry Jam, but today I'll be making Triple Berry Jam with strawberries, blackberries and raspberries.
If you don't want to make jam, you could wash and freeze the berries too. Theres nothing better than eating sun-ripened strawberries in the dead of winter. I thawed out my berries from last year in February and it tasted just like summer.
Well I might be a little late to the game, but I've been bitten by the Mandala bug. The patterns that I used were the Little Spring Mandala from Made in K Town, The Starflower Mandala by Zelna Oliver and the Sunburst Mandala by Oona Linnet. They are all wonderful patterns.
Granny Squares & Ripples I've been struggling with exactly how to present this. It is more of a technique than a pattern and it is really VERY easy. I started this project yesterday with the goal of making granny squares into ripples and then making the ripples edges straight. Its basically a granny square sampler of sorts. In the center you have your basic Granny Square. Each side of the Granny Squares are then rippled outwards. Finally, I used, what I guess you could call, a type of short row to fill in the triangle spaces on the sides and make them straight.
Materials: Any yarn and any hook size. Your finished project will vary in size depending on which yarn and hook you use, but the finished product should look the same
I used Lily Sugar and Cream and an H hook
Square (make any odd number of squares. For this example, I made 3)
Here is a pattern for a basic Granny Square. You can make the squares any size you want; I used 4 rounds. Rnd 1: Make a magic ring. Ch3 into ring, 2dc, ch2, *3dc, ch2*. Repeat from * to * 3 times. Sl st to top of ch3. Fasten off Rnd 2: Attach new color with standing st. in any ch2 space from rnd 1. 2dc , ch2, 3dc in same space. *3dc, ch2, 3dc, ch1*. Repeat from * - * 2 more times. Sl st to top of standing st. Fasten off.
Rnd 3: Attach new color with standing st in any ch1 space from rnd 2. 2dc in same ch1 space. Ch1, in corner space 3dc, ch2, 3dc, ch1. Continue around working 3dc in each ch1 space and 3dc, ch2, 3dc in each corner space. Sl st to top of standing st. Fasten off.
Rnd 4: Same as row 3
Granny Square with four rounds
Now we will join the squares
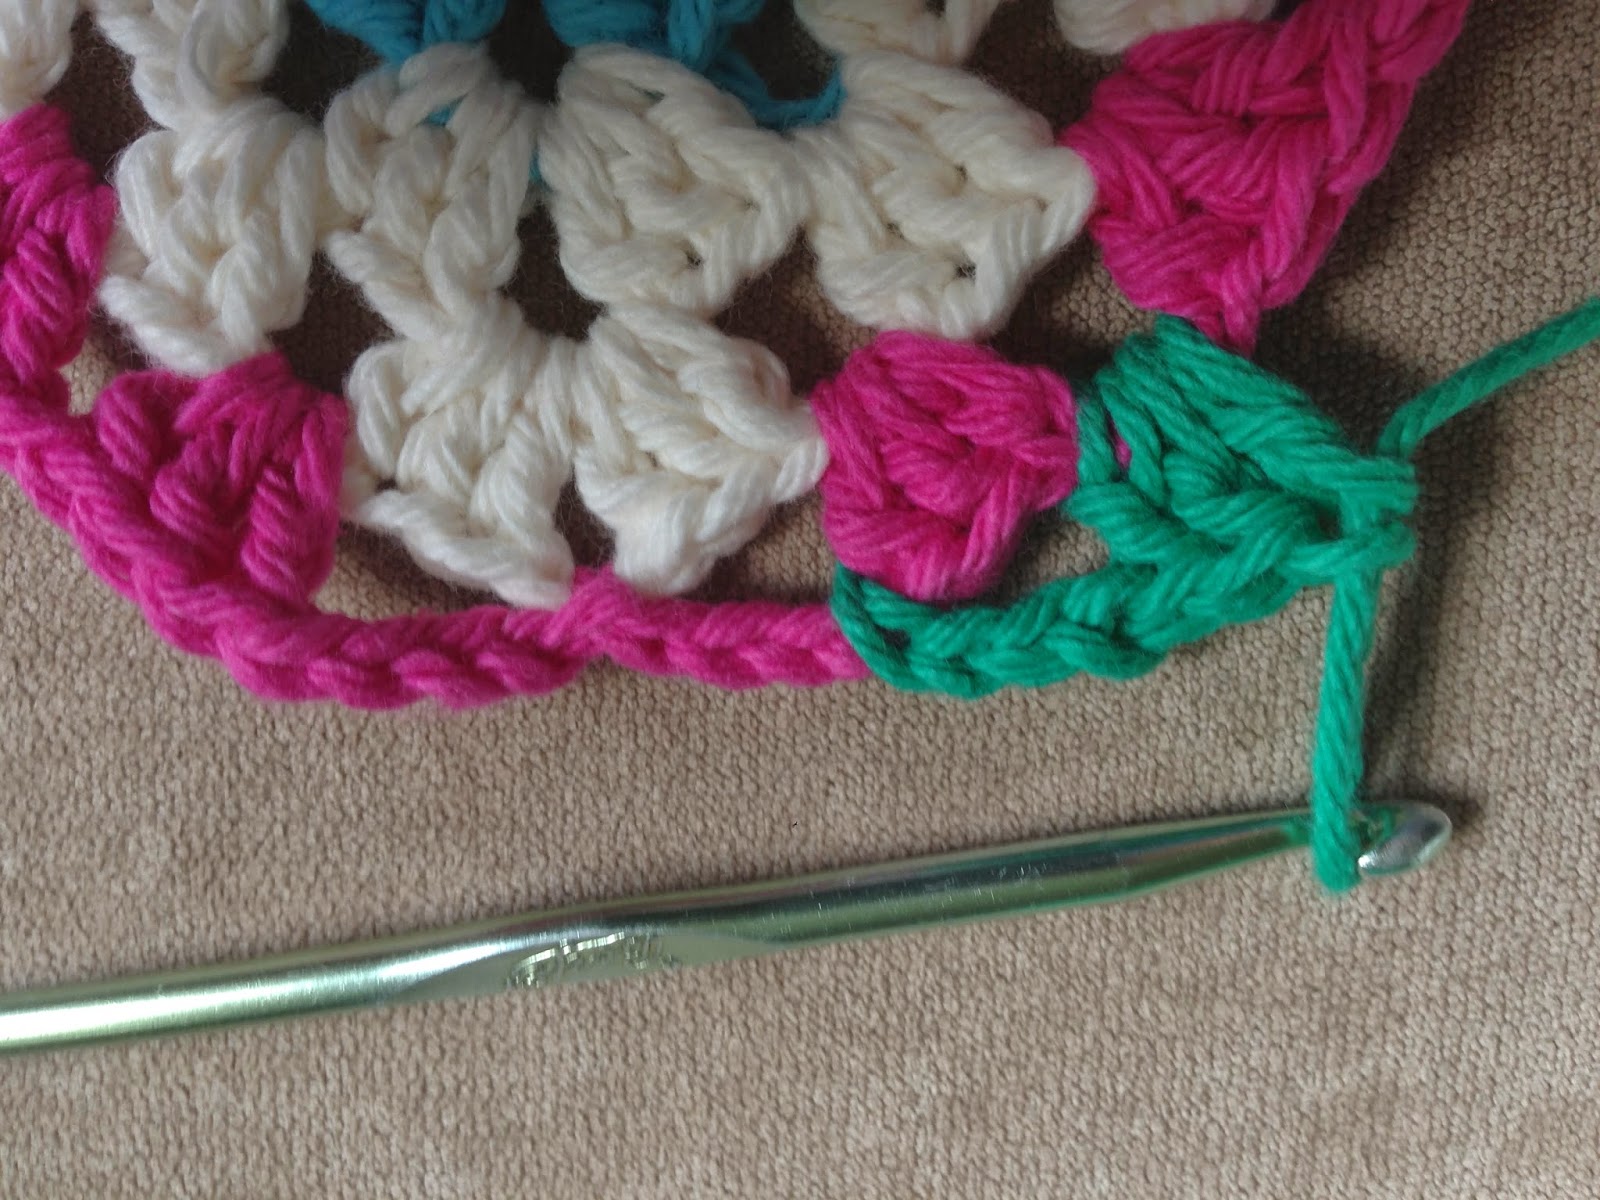
Rnd 5: In the corner ch2 of any square, standing st, then 2dc, ch1 in same space, 3dc, ch1 in next 2 ch spaces. In corner space, 3dc, ch2, 3dc, ch1. Continue doing 3 dc, ch1 in each ch1 space from the previous row. Stop when you reach the next corner space. Now we will join the squares. 3dc in the corner space. Take another square, and one of it’s corner ch2 spaces, do 3 dc. You continue in this manner around the outside of the squares, attaching new squares as you go. When you reach the starting point, do 3dc in the same corner space where you joined, ch2, sl st to standing st. Fasten off.
Row 5
Working the 6 center dc sts together on row 6 Rnd 6: Same as rnd 5
(Please note that you will now be working in rows, not rounds.)
A beg. ch2 and 1st 3dc group used to start rows from 7 on
Row 7:
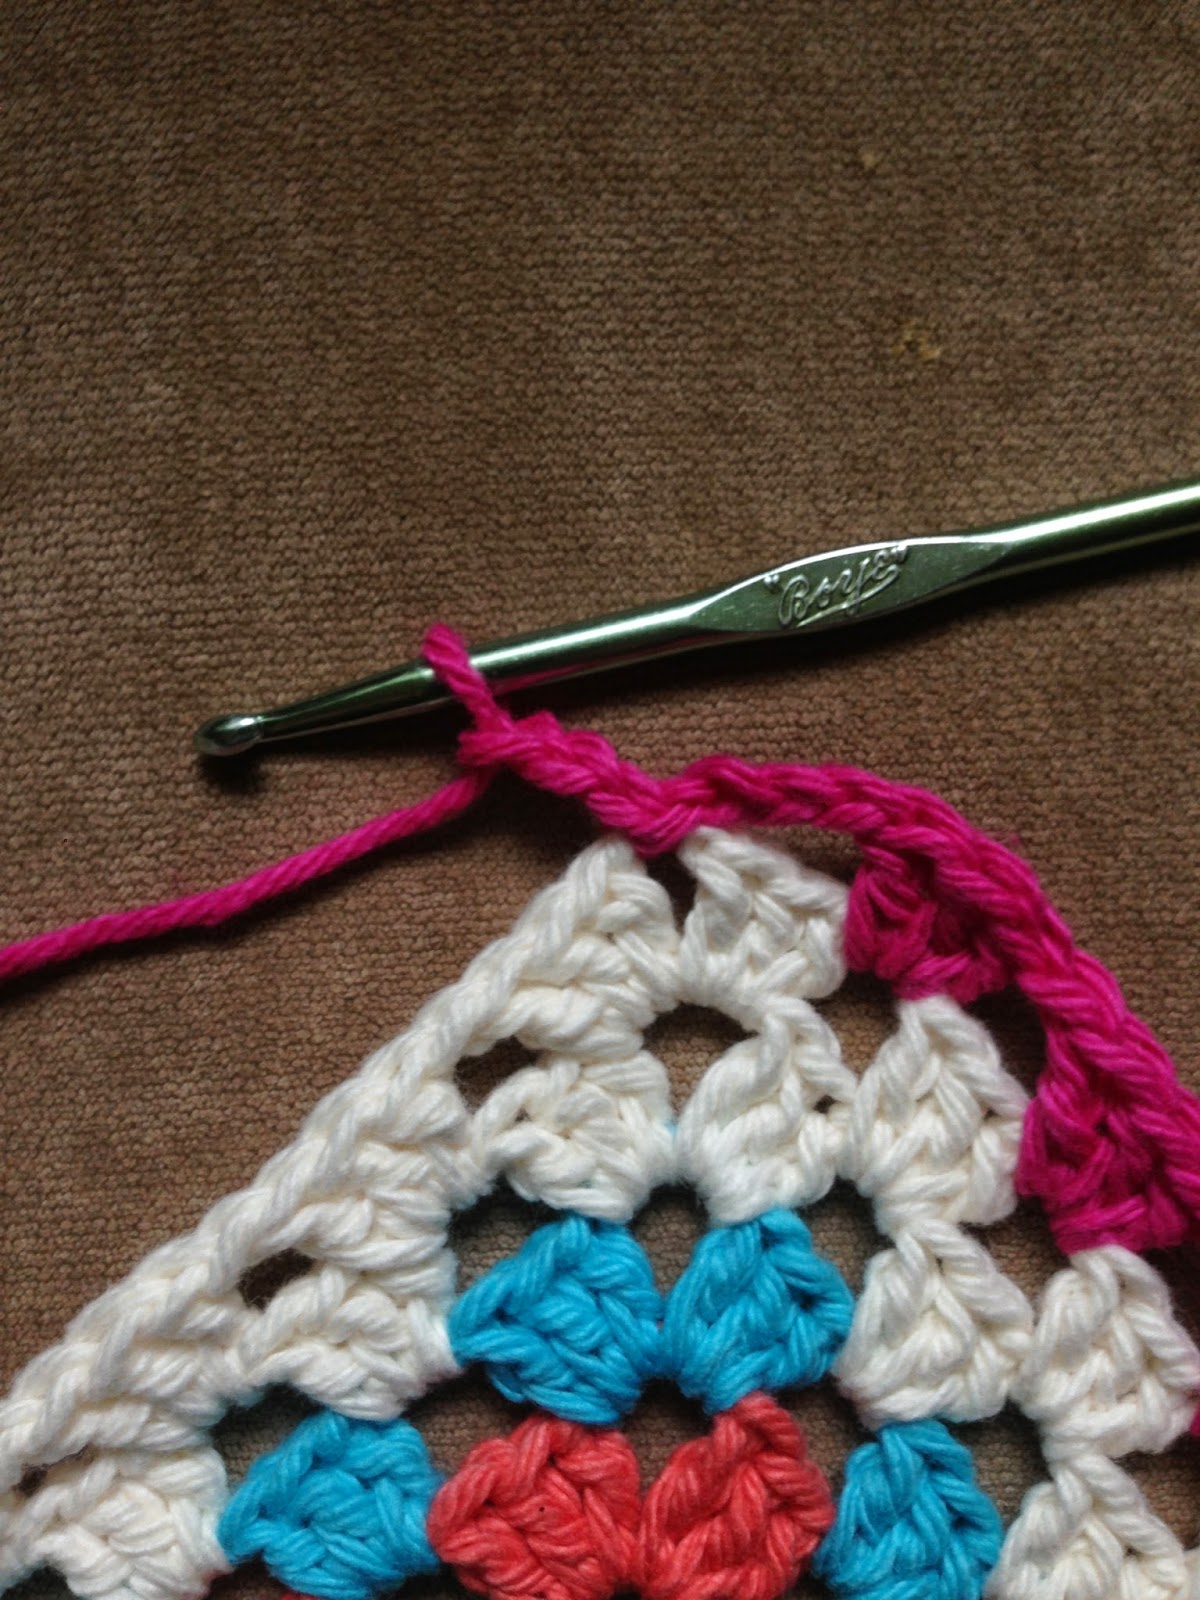
Pull up a loop of a new color in the center of the ch2 space on either the top or bottom of the piece. (You will be working each side of the piece separately.) Ch3, then *3dc, ch1into the ch1 space* from the previous row. Repeat from *-* 4 more times. 3dc, ch2. 3dc in corner space. Work 3dc, ch1 over the next 3 ch1 spaces from the previous row. Work 6dc over two center sts. Continue in this manner to the end of the piece; stopping before you reach the corner of the opposite side. Ch3 and attach with sl st to corner ch2 space.
Row 8 - 12: Repeat row 7 Now we will begin to straighten out the ripples Row 13: pull up a loop in the ch3 space from the beg. of the previous row. Ch3, *in next ch1 space 3dc, ch1*. Repeat from *-* until you reach the space before the top cluster. In the space before the cluster, 3dc, ch3. Sl st to the ch2 space in the center of the cluster, ch3 and continue down the other side doing 3dc, ch in every ch1 space, and doing 6dc across the two center sts until you reach the end of the piece. Ch3 and attach with a sl st to the ch3 space at the end of the previous row. fasten off. As you can see, you are not working the points, but making them into a straight edge. The initial and ending ch3 spaces have been forming the straight side of the piece.
Final 3dc and ch3
Attaching the ch3 with a sl st
The amount of stitches per row will be decreasing as you go.
Row 12
Row 13 Row 14: Pull up a loop in the ch3 space from the beg. of the previous row. Ch3, *in next ch1 space 3dc, ch1*. Repeat from *-* 3 times. Ch3, sl st to ch3 from previous row. Fasten off. Continue down the other side doing 3dc, ch1 in every ch1 space; 6dc across the two center sts; chaining 3 and fastening off then starting the process over until you reach the end of the piece. Ch3 and attach with a sl st to the ch3 space at the end of the previous row. fasten off.
Row 14
Row 15
Row 16
"Row" 17
"Row" 17 in not really a row. Pull up a loop in the right ch3 space of the last unattached pair of center sts. Ch3, sl st to opposing ch3. Fasten off. Correction: For "Row" 17, just slip st the two remaining unworked chain spaces tog. Fasten off
For a rounder edge, ch3, 3dc, ch 3, sl st into next ch3 space, fasten off. (Shown above)
I wanted more of a square edge so I did: Ch2; in ch2 space from previous rnd 3dc, ch2, 3dc; ch2, sl st to next ch 3 space, fasten off.
As you can see, you will end up with quite a few tails to weave in. I try to crochet over the ends as I go to minimize sewing at the end of the project
I edged the piece in 2 rows of basic granny st; 3dc in each space, no ch. You have to eliminate the ch1 space or the finished piece would be very wavy. I'll upload a picture of the finished product, which turned out to be a rug , once I've seen in all those ends and blocked it. I really hope this not too confusing, but I wanted to try and make it easy for anyone to do. Some times less is more, but I think it helps to see all the pictures row by row. Please let me know what you think of this pattern and please let me know if you find any mistakes. This is only the 2nd crochet pattern Ive ever written so I'd love some feedback.