Etsy

Showing posts with label doubleweave. Show all posts

Sunday, September 4, 2016

Adventures in Doubleweave

I had a bunch of horrible acrylic yarn I wanted to get rid of so I decided to sample some doubleweave. I plan to do a very large double width wool blanket but before I invest time and money on such a large scale doubleweave project, I think a bit more practice might be in order. 

I only have a 10 dent reed so I had to use a relatively big yarn to get close to 20 epi (10 epi per layer). 


I decided to mess around a bit with color so my warp was threaded with tan as the light color and 2 different blues as the dark color. I threaded 4d,2l,3d,1l for block A and 4l,3d,2l,1d for block B. 


My treadles were tied as follows:
1- shaft 1
2- shaft 2
3- shafts 1&2
4- shaft 3
5- shaft 4
6- shafts 3&4

Doubleweave with interchanged layers 

Doubleweave with 2 separate layers 


This just plain weave (only using treadles 3&4)

The sett was WAY too tight, but I'm happy with the selvedges and I only had one skip on the bottom layer. 

Happy Weaving!

Wednesday, October 21, 2015

Rigid Heddle Doubleweave - A picture tutorial

I have been asked several times recently about doubleweave on a Rigid Heddle loom so I thought I'd do a step by step picture tutorial. By far, the best resource I've found on the subject is "The Weaver's Idea Book, creative cloth on a rigid heddle loom" by Jane Patrick. I think it is an essential for every rigid heddle weaver. 

I think I nearly turned my brain inside out trying to figure out the threading diagrams online for two heddles. I know it seems daunting, but you just have to do it and after a minute or two, you'll get it. 

Ok, let's start with the threading. When direct warping a rigid heddle loom for doubleweave, you need to have 4 threads per dent. For this example I am using 8/2 unmercerized cotton and two 10 dent reeds on a 15" Flip Loom. This will give me a set of 20epi for two heddle plain weave and 10epi per layer for doubleweave. 

Here you can see 4 threads through each slot. The next step is to take one thread from each slot and sley it into the hole directly to the right, like this....

So now you have 3 ends in a slot and 1 end in a hole. Though it may seem more complicated, I find that using a striped warp for doubleweave actually makes the threading easier. Sometimes, with one color, you can get lost in the threading or easily cross warps behind the heddles, which is not good.

So, onto the 2nd heddle. Place the second heddle in front of the 1st heddles. Take a close look at the threads. 


Take the 1st grouping of 3 threads from the rear heddle and drape them over top the front heddle, like so....


Take the left most thread and sley it in the  corresponding slot in the front heddle. 


Then take the 2nd thread and sley it through the next hole.


Now take the 3rd thread and sley it through the next slot. Next, take the hole thread from the rear heddle and sley it through the same slot as the last thread in the front heddle.


Continue across, sleying the 3 slot threads from the rear heddle into the front heddle as follows: slot, hole, slot. The hole thread from the rear heddle will always go in the last slot you sleyed in the front. 


Now that all the threading is done, it's time to tie the warp into the front beam. I do this with both heddles in the Up position. Once you have adjusted your tension, it's time to spread the warp and check for threading errors. 

Oops, I found two pairs of twisted warp threads. 


They will show up on the weaving like this.....


Now you must untie that group of warp threads and try and figure out the threading mistake. Embrace the mistakes!!! Everyone makes them, you just need to use them as a self-teaching tool. This goes for knitting and crochet as well. Don't give up. Figure out the mistake and why it happened. Next time, you either won't make the same mistake, or you'll know right away how to fix it. 

Ok, now onto the pickup sticks. Put both heddles in the down position. Take stick A and pick up every other thread like this.....


Now, turn the stick on edge. Insert another pickup stick in the shed formed behind the heddles. Remove stick from in front of the heddles. 

Now, place both heddles in the up position. Slide stick A forward to the back of the heddles. You will see that a small shed is formed. Insert stick B in the shed like this.....


Slide both pickup sticks to the back of the loom. You're all done! Let the Doubleweave commence :)

To see a video of how to weave double wide cloth on a rigid heddle loom, please visit my YouTube channel at the following link.......


Happy Weaving!


Sunday, June 7, 2015

Doubleweave with 3/2 Pearl Cotton

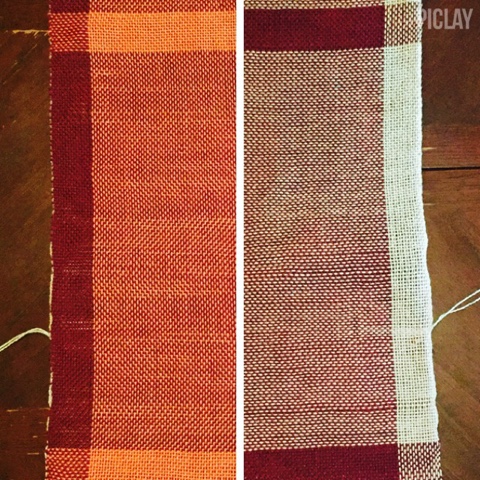
For my next adventure in doubleweave, I used two 10 dent heddles threaded with 3/2 Pearl Cotton in wine, melon and natural. 

The natural and wine colors were threaded for the bottom layer and the wine and the melon were threaded for the top. 

First I wove two towels in two layer double weave. Being mindful of my shrinkage issues with the last towels, I made sure to use a guide string. I used wine for the bottom weft and melon for the top weft.
That nice little pull on the bottom layer is curtesy of my 2 year old son ;)

I next wove Heddle 1 up, heddle 1 down, heddle 2 up, heddle 2 down using the same guide string I used for the towels. For the weft, I alternated two picks of wine and two picks of melon. 


It was very interesting to see how a change in weft color so drastically alters the appearance of the weave. The light weft in below places more emphasis on the weft and the weave appears weft faced. The opposite is true with the dark weft which appears more warp faced. Now, granted, this is all under tension on the loom and after wet finishing will probably even out. 

Finally I wove the rest of the warp with tubular double weave. I used two wefts and interlocked them at each selvedge.

Fast forward a few hours.....

And the fabric is off the loom!!!!!!!!

I had a few warp floats on the edge of the white and wine towel :(


Top and bottom of tubular doubleweave 

Now into the washer and the dryer.....


Saturday, June 6, 2015

Wet Finishing Woven Cotton


After making the cotton towels I listed in my last post, I machine stitched the towels and threw them in the washer then in the dryer. I was very surprised at what came out. 

I've wet finished wool before with the expected results; quite a bit of fulling and felting. In the past, when I've wet finished cotton, there has always been a bit of shrinkage, but these towels were actually transformed.

I wish I'd had the foresight to measure the towels before they were wet finished, but hopefully these pictures will show the transformation.

Here is the rib pattern towel on the loom.....


Closeup of the stripe detail

Here is the rib pattern towel off the loom and machine stitched before wet finishing.

Here it is after wet finishing.


I LOVE IT! The softness and drape of this fabric is amazing. Of all the towels I made, this pattern lost the least amount of width and length. I wish I had a loom that was capable of making this fabric in a larger size as it would make the best blanket ever. 

Now onto the twill. Here it is on the loom.....

Here it is off the loom and machine stitched...
Though I ran out of warp and this towel ended up being a square, I thought I could use it as a mat for a plant or a trivet. However, after wet finishing. I was left with this rectangle .....

Top Side
Reverse 
Closeup of both sides of twill

Finally, the plain weave cotton towel. I used a cream colored acrylic yarn for the weft, only because I had some left on a shuttle. 

Here is the plain doubleweave on the loom....
It was rather a long rectangle, so I was very surprised when it finished like this.....

An almost perfect square ;)

I learned, from this experiment in towels and wet finishing, that you must really take the length of your warp into great account when planning a woven fabric. I used a guide yarn in my next project and hopefully it will help in attaining the length I want in my finished product. 

I hope this was helpful in some way.

Happy Weaving!


Wednesday, June 3, 2015

Woven Cotton Towels


I love cotton. Love, love, love it. It's my absolute favorite fiber for knitting, crocheting and weaving. Strong, easy on the hands and machine washable and dryable are just some of cottons' many virtues. 

I made cotton towels as one of my 1st weaving projects. Since I only had a 10 inch loom, my finished waffle weave towels looked more like washcloths. 


Here is towel weaving project #2. I warped my 15 inch loom with two heddles and 8/8 unmercerized cotton. 


I played around with the 1st few inches of warp to figure out how dense the fabric would be.


Then I wove a few inches of double layer doubleweave with a purple weft on the upper layer and pink on the bottom layer. 

Then I made a towel with "ribbing" using a black weft ....

This pattern always gives me selvedge issues.

Then I decided to give twill a try. For this I needed to make a heddle rod. The yarn was quite sticky and it was hard to get a clean shed, but I persevered.

That mistake is really bothering me ;) 

Again, the twill pattern left me with major selvedge issues. 

I then made a towel in plain weave with white weft. 

 
Finally I went back to the twill but used 3/2 cotton as the weft. 


More of a square than a towel...I ran out of warp :(

Overall, I'm happy with the results. I especially like how the rib pattern and the twill pattern produce a different design on the reverse. I need do some selvedge assistance with these patterns though. 

Sunday, May 31, 2015

Doubleweave & Two Heddle placemats

My long awaited 10 dent heddles arrived a few days ago so I was anxious to use them right away. I had also just received  an order of 3/2 cotton so commence warping!

Threading the 1st heddle 

I used green and light blue 3/2 cotton along with narrow strips of Zauberball Crazy ball in holly blue.

I played around a bit on the beginning of the warp trying to figure out what weaving structure and weft best showed off the color changes in the Zauberball. 


I ultimately decided to go with two heddle weaving instead of doubleweave because the doubleweave fabric seemed a bit more open than I would like. I used the Zauberball as the weft. This produced a dense fabric with a very subtle color change.


After weaving about a yard and a half, I got bored and changed my mind (as usual) and decided to weave the rest of the warp with tubular doubleweave. This is still using the Zauberball as the weft, but the color change is much more pronounced. 


Here are a few inches in tubular doubleweave (see below for instructions). As you can see, there are some tension issues with this warp 😢 I was surprised that the 3/2 cotton was so stretchy. Instead of worrying about the warp tension, I just went for it, being mindful of catching errant threads and not beating the weft too hard. 

Well, here is the fabric off the loom. 


No matter how many pictures I take, I can't capture the colors in this weaving. You'll have to take my word for it, it's really cool. 


Closeup of Doubleweave section off loom, before finishing. 

Closeup of several different patterns on one two heddle warp and two weft colors. 


I hope to wash and machine stitch these placemats tomorrow, so keep looking for pictures. 

Next project, cotton towels with 8/8 cotton.

Happy Weaving!

Tubular Doubleweave 
With two heddles threaded....
1. Place both heddles in down position.
Take pickup stick and pick up every thread. Turn stick on edge. Place another pickup stick in the new shed and slide to back of loom. 
2. Both heddles up. Sliced 1st pick up stick just behind heddles. Place 2nd pickup stick in new shed and slide to back of loom. 

Weaving sequence:
1. Pickup stick 1
2. Heddle 2 up
3. Heddle 1 down
4. Pickup stick 2